Showing posts with label Breads. Show all posts

Friday, February 7, 2014

Paleo Style Chicken Curry & Spinach w/ Paleo inspired Naan Bread

Pin It

Let's just get to it. Curry part of this recipe can feed at least 2-3 people.


Chicken Curry & Spinach w/ Paleo Naan

6 oz. cubed chicken breast
1 Tbsp. Tapioca Flour
1 Tbsp. Curry Powder
1/2 tsp. Turmeric
1/4 tsp. Cumin
Salt to taste
Red Pepper Flakes (optional)
1 1/2 Tbsp. Butter
1 C. Lite Coconut milk
1 C. Water
4-6 C. fresh Spinach
Coconut Oil Spray

For the Naan Bread - I was totally inspired by the recipe I found at My Heart Beets. 

It is fabulous!!!  It only uses three ingredients!!which led me to experiment more with Tapioca Flour, especially using it in this simple and fast curry.

1. Spray med. size pot with Coconut oil. Heat to med. high and cook cubed chicken. About 5 min.

2. While chicken in cooking, put the next 4 ingredients in a small bowl, adding red pepper flakes it you like (the more you add the spicier...I like it hot!!). Mix together well.

3. When chicken in nice and golden remove from pot. Add butter and reducing heat to med. low. When butter has melted dump in the spice mixture, stirring together using a whisk. Add coconut milk and water. Whisk! Whisk! Whisk. (This combines & thickens pretty fast).

4. Add chicken back to the sauce. Allow to simmer on low for 3-5 minutes. Salt to taste.

Sauteed Spinach

1. Spray a skillet with the coconut oil and heat on med high.

2. Add spinach and as it wilts down add just a Tbsp. of water. Stir around making sure all leaves have been cooked down. Salt to taste.

Happy Eating!!

Tuesday, January 28, 2014

Lemon-Blueberry Pancakes using Almond Flour

Pin It


For a little while now I have not been eating flour, rice, bread, dairy products, sugar....in short I've been eating more paleo.  I have never felt so good!!! I've always thought that it was gimmicky and never wanted to do anything thing that was trendy or just for the moment. But, I hit a plateau in my weight loss journey and I was frustrated. 

A friend of mine told me she was going to do this paleo diet thing and wanted to know if I wanted to do it too.  I ignored the request, but she kept telling me how it has helped her husband's pain subside and he lost 10lbs. in the first couple of weeks...ALL JUST BY CHANGING HIS DIET to a more wholesome and real food one.

So I decided, quietly to do the same.  I didn't tell anyone, not even my family. I just started cooking differently and making sure the meals provided where less starchy and more veggie wholesome with great proteins.  They have not gripped one bit.  My husband and eldest son, actually gave me a compliment on the changes they can see. I have lost 11lbs. in the last 2 weeks eating this way.

With that said, I realized I will need to start having some bread items, as I LOVE BREAD!!! So, this is my first bread item, that doesn't have your typical flour. It uses Almond Flour.  You can make it yourself, if you have a great blender (raw slivered almonds would be easier than the whole on your blender, just pulse until nice and fine crumbly) or buy it at your local grocer.  We have a WinCo market here and they have almond flour in their bulk section.

Lemon-Blueberry Pancakes w/ Almond Flour
Serving Size:3 pancakes

1/2 med. banana, mashed
1/2 tsp lemon juice
1 lg. egg
1/4 C. Almond Flour
1 tsp. baking powder
1/8 tsp. baking soda
1 Tbsp. Sliced almonds
1/2 C. thawed, frozen blueberry or fresh (next time I think I will only use 1/4 C. It wasn't a problem, just a little heavier than I some would like, but I love blueberries!)
Coconut Oil Spray

1. Mashed the bananas until they are very gooey. Add the lemon juice & egg. Mix together well.
2. Add the flour, baking powder, soda, and almonds. Stir together until nicely combined.
3. Add blueberries. Fold them into the batter, being careful not to crush them.

4. Spray your pan with the Coconut oil. Heat on Med-Low. (this is key!!) Scoop a 1/4 cup of the batter into the pan and using a spatula spread it out a bit. Note: This is not a super runny batter. Cook for 2-3 minutes and then flip and cook for an additional 2 minutes.

5. Serve and top with the remaining half of the banana.  (In my opinion, no need to syrup).

Thanks for stoppin by!! I hope you like.

Wednesday, March 6, 2013

Roasted Tomato & Egg Salad Sandwich....For One.

Pin It
I have really been focusing on my health and healthy eating lately and with my recent slip on the ice, I haven't been able to do a whole lot of crafting.  With that said, I have been really paying attention to my yummy food intake, especially since I have made a commitment to myself and weightwatchers.

So now you know why you have been seeing so many recipes.  No worries, I will be back in the swing of crafting things in a month or so...hey I might even sneak in a craft or during my "down time."

Anyway, I have a great recipe for a 6 PP egg salad sandwich w/roasted tomatoes and it is SUPER EASY to make.

Roasted Tomato & Egg Salad Sandwich- FOR ONE

Ingredients:
  • 1 hard boiled egg
  • 2 tsp. spicy brown mustard
  • 2 slices roasted tomato (recipe to make your own below)
  • 1 slice of Great Grains Multi-grain bread with flaxseeds.
Instructions:
  1. Chop up the egg and add the mustard; mix well.
  2. Cut 1 slice of bread in half.
  3. Assembly sandwich as seen in the photo.
...now as for the roasted tomatoes

Roasted Tomatoes

Ingredients

Instructions

  • Preheat oven to 500 degrees.
  • Slice tomato into eight slices & put in to a bowl. add the remaining ingredients to the tomatoes.
  • Using your hand mix together, be sure to coat each tomato.
  •  Line a cookie sheet with parchment paper.
  • Place each tomato on the baking sheet. Bake for 20-25 minutes. Allow to cool.
Enjoy!!  Thanks for visiting!!

Friday, February 22, 2013

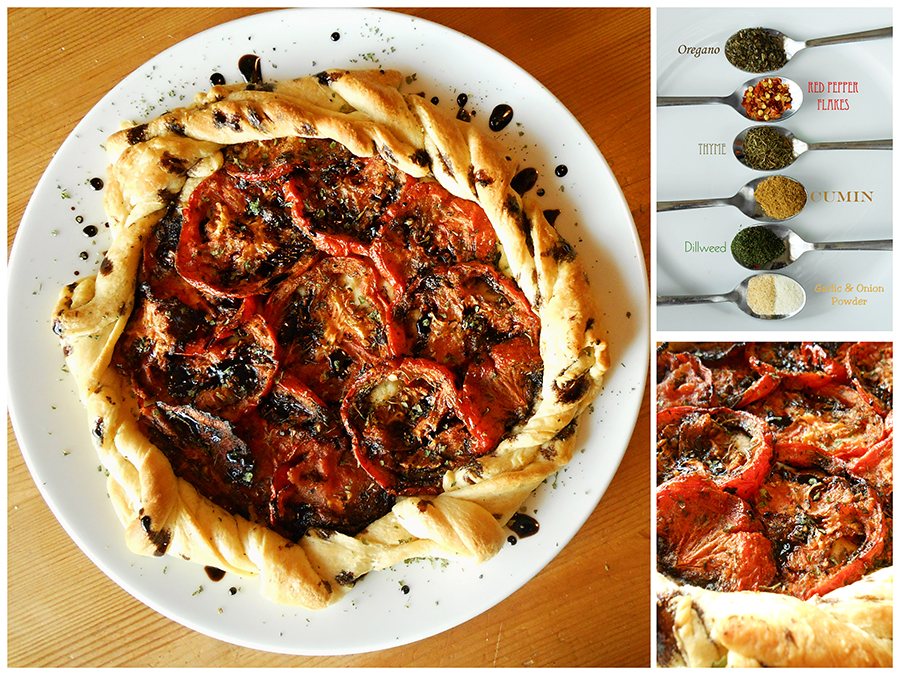
Roasted Tomato Tart w/ Balsamic Glaze

Pin It

Summer can't get here too soon for me.  I have been craving the taste and feel of summer all this winter. 

So today, I needed to have it.  Not even sure what to call this dish, just having Summer Lovin' withdrawal.

This dish is really simple to make, but a little time consuming, but if you do the tomatoes and glaze ahead of time, you can whip it out pretty fast.  It is great as an appetizer or even having a slice for lunch with a nice salad, is sure to please.


Roasted Tomato Tart w/ Balsamic Glaze

Ingredients:
  • 2 vine ripe tomatoes
  • olive oil (just enough to coat the tomatoes)
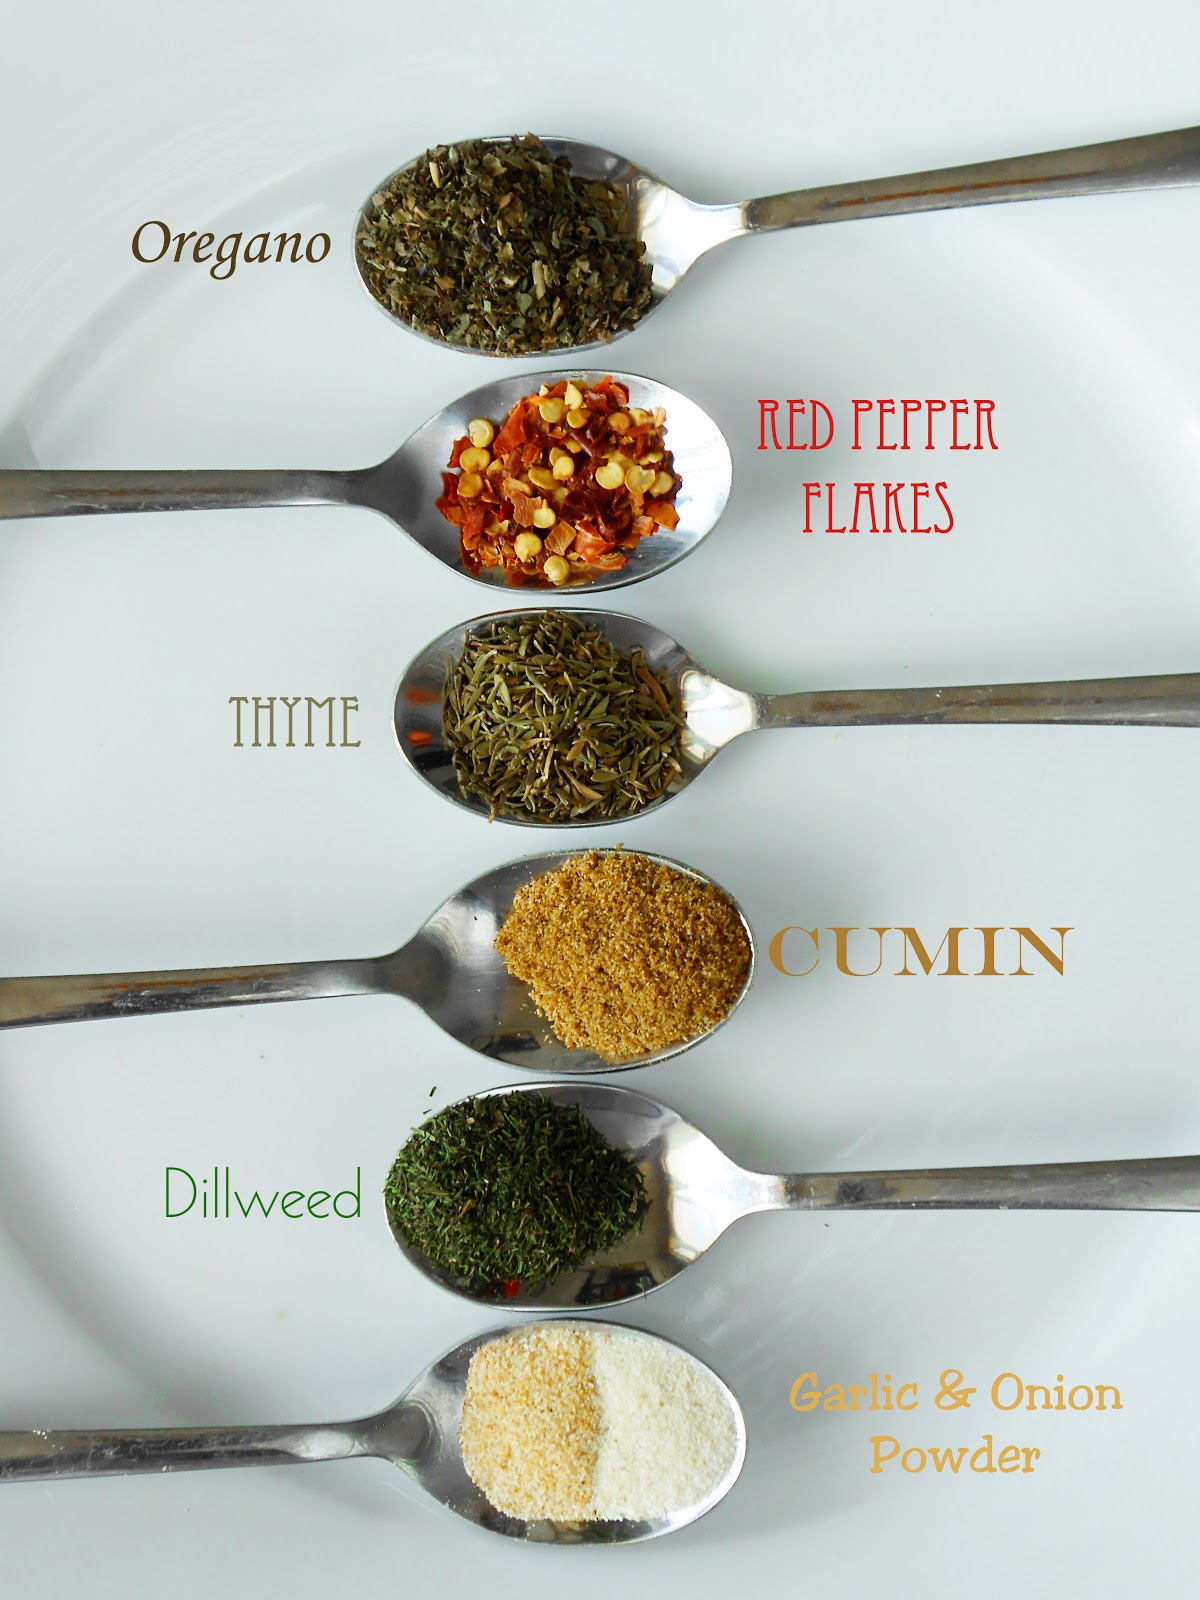
  • dry herbs (Add all that you like, this is a very forgiving dish.  You can add or omit whatever you like.  These are the ones I used for my tart.)
  • Crescent dough
Instructions:
  1. Preheat Oven to 450 degrees.
  2. Slice tomatoes just over a 1/4" thick. Place in large bowl.
  3. Add all of your herbs and oil and toss, using your hands. Be sure to coat the tomatoes well.
  4. Place tomatoes on parchment paper prepared cookie sheet. Single layered (close, but not touching).
  5. Place in hot oven, cooking for about 30-35 minutes until caramelized and looks dry.
  6. Remove from oven and allow to cool.
  7. Reduce heat to 375 degrees.
  8. On a pizza stone or pan, lay crescent triangles in a circle, points out.  Using a rolling pin, flatten the dough, be sure to fill the center.
  9. Place the cooled tomatoes in a spiral pattern on the dough. 
  10. Lift each point and twist and tuck around tomatoes
  11. Return to a oven, cooking for 11-13 minutes.
  12. Allow to cool for a couple of minutes before serving.
Makes about 8 single slice servings.

Sauce:
NOTE:  I make my own.  It's not hard, you just have to watch it and stir occasionally. But I would recommend just heading to the grocery store and getting a bottle (I will make a video, because it's a little hard to explain in words).
  • Drizzle the sauce all over the top of the tart. Sprinkle with a little dry parsley flakes.
Yum!!! 


Thanks for visiting!! 

Wednesday, February 13, 2013

When in a pinch....Make Biscuit Pizzas

Pin It
When in a pinch....Make Biscuit Pizzas.

 
With all of our responsibilities, sometimes dinner is late....okay most of time nowadays, dinner is late, but one thing I like to make sure of is that we have "quickies" at the ready.

I keep at least 2 canisters of grands biscuits in my fridge for that very reason.

Here's how we make a quick pizza:

1. Open the can and pull apart the biscuits.
2. On a cookie sheet ( I use a stone ), press down the biscuit, until it is about 6" inches in diameter
3. Top it with a Tablespoon of your favorite spaghetti or pizza sauce and a 1/3 cup of shredded cheese.
4. Now this optional: pepperoni or chopped veggies, mushrooms, jalapenos, etc. etc. Cook at 425 degrees for about 10-12 minutes. :-)

If you really want to get all fancy use pesto as your base, topped with shredded cheese, spinach and grilled chicken. YUM!!!

Monday, December 24, 2012

Eggnog Glazed Donuts

Pin It
This is what happens when your 8-year old asks for donuts and the kind he likes (Hostess) is no longer.
You learn how to make donuts!!  And I will have to say, they are so gooooood!!!

For many years in my cooking life, I have seen the most bizarre kitchen tool and for the life of me I have never been able to figure the thing out until......today, Christmas Eve.
Well, that darn thing was a donut cutter!!  The double rings, the big and little circles.  Well, needless to say, I have already thrown it away.....years ago. Foolish me.
I sat there looking at all that extra dough I had left from making a to die for roll recipe I found on how does she.  Highly recommend you follow that dough recipe for this. 
Anyway, this is what I did, but the best thing was the glaze.  I had the big idea that since it was Christmas season, why not make the donuts a little more festive.  So my Eggnog Glaze was born.  I hope you love it as much as we do....


 Eggnog Glazed Donuts

Donut
*Used the dough recipe for the dinner rolls from here.
*Roll out dough to about 1" think and use a donut cutter or in my case, I used a really large circle cookie cutter and a small biscuit cutter.  What ever you decide to you just make sure it looks like a donut. :-)
*Set the cut donuts and holes on a towel and cover and allow to rise for about 30 minutes.
*Heat a large soup pot with vegetable oil to medium high.  To check to see if the oil is ready, I take a pinch of flour and sprinkle it in the oil.  When it gives a nice sizzle you are ready.
*Place a couple of donuts in the oil and gently turn them.  Allowing a nice golden color to be on both side of the donut.  This will take about 1 1/2 - 2 minutes. So stay near.
*Remove the donut and place on a wire cooling rack.

Glaze
1/2 C soft butter or margarine
3 C Powder Sugar
1 Tbsp. Vanilla Extract
1/2 C Eggnog

*Mix together in a bowl and once your donuts have cooled for about 5 minutes...dunk em' in the glaze and place on a wire rack with a catch pan underneath.... ENJOY!!!

Merry Christmas.

If you try these I would love you to tell me what you think. 

By the way, what are some of your favorite donut glazes/toppings?

Tuesday, April 10, 2012

Cranberry-Banana-Almond Nut Bread

Pin It
I love to cook!  The only problem is that I am not very good at following directions when it comes to cooking.  I love to experiment and I love to do things a little different.

Today, I tried my hand at Banana Bread making.  I have only made banana bread twice in my whole life.  Not a real fan.  It always comes out too dry.  But my 7-year old son spotted a few very black bananas on the counter and joyfully said, "Let's make banana bread, Mom!!"  

I usually just chuck those into the garbage before anyone notices.

Whenever I have had banana bread I have had to slather it butter to put back some of the moisture lost in the baking.  So, if it were ever to be somewhat good for you I killed it with the ton of butter I "frosted" the slice with.

Well, with all that said, I knew I was going to have to make this loaf a lot differently.  And the first thing I did was use my own home-ground wheat flour.  And of course I had to add my son's secret ingredient, which adds so much moisture that you won't need all that butter.  At least I don't think you will.

Cranberry-Banana-Almond Nut Bread
  • 1/2 C sugar
  • 1/4 C soften butter
  • 2 eggs
  • 2 very ripe bananas
  • 1/2 C sour cream
  • 2 1/4 C 100% whole wheat flour (use hard white if you can, makes bread not as heavy as with red)
  • 1tsp. salt
  • 1/2 tsp. baking soda
  • 1tsp. cinnamon
  • 1/4 C applesauce (my son's secret ingredient, shh don't tell him I told you)
  • 1/2 C chopped almonds
  • 1/2 C cranberries (I use the cran-strawberries from the bulk section from my local grocer.)
  1. Pre-heat oven to 350 degrees.
  2. Cream the butter and sugar until nice and fluffy.
  3. Add eggs one at a time.  Blend them well with the butter sugar mixture.
  4. Mash the bananas then add them by stirring them into the mixture, then do the same with the e sour cream.  Once that is all mixture put in the applesauce (the secret ingredient!!)
  5. In another bowl sift together all the dry ingredients (flour, salt, baking soda and cinnamon). NOTE: I sift to give the wheat flour a little lift.  Remember this is wheat flour so it is a little heavier then the white all-purpose flour.
  6. After you have sifted your flour, add it to the wet mixture.  Kinda stirring/folding it in.  Then add the nuts and cranberries.
  7. Spray a bread pan (I think mine is a 8.5 x 4.5 x 2.5)
  8. Pour your dough in the pan and back for 1 hour or until knife comes out clean.
  9. Let the bread rest in the pan for about 10 minutes and then remove it from pan and cool completely on a cooling rack.
NOTE:  This bread can easily be done with regular white flour.  All the measurements and times stay the same.

If you make this wonderful bread, leave me a comment telling how you liked it.  And if you did it differently....tell me what you did.
Related Posts Plugin for WordPress, Blogger...