Wednesday, April 18, 2012

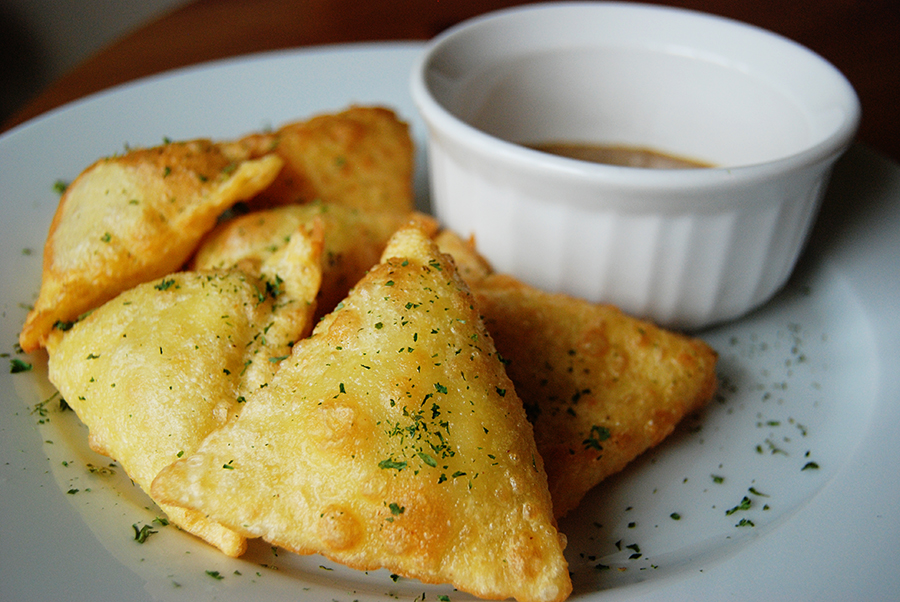
Fried Chicken & Mozzarella Ravioli and Mustard Sauce

Pin It
I am not a person who likes to fry things a lot, but today, I was craving fried ravioli for lunch.  I didn't have any in my food storage, so I stopped by NPS and they just so happen to have unfrozen Pasta Prima Ravioli on sale.  SCORE!!  I picked up a package and off to home I went.

I have never made fried ravioli, but hey I like to try new things.

 This was easy and DANG GOOD!!!


Fried Grilled Chicken & Mozzarella Ravioli with Mustard Sauce
  • 1- 8oz. package of fresh ravioli (I used Pasta Prima 100 % Natural Grilled Chicken & Mozzarella Ravioli, I'm sure you could use any fresh ravioli you like.)
  • 4 Cups vegetable oil
  • 2 Tbs. Natural Stone Ground Mustard
  • 1 Tbs. Agave Nectar
  1. Heat oil in a sauce pan to med. high.
  2. Once oil has reached desired temp.  gently drop ravioli in oil.
  3. With a skimmer spoon gently roll ravioli in oil, making sure both sides are becoming a golden color. (This happens fairly quick, 45 seconds to a minute.) Then remove and place ravioli on a plate lined with a paper towel to collect the excess oil.  (I did this in two batches)
  4. While those are resting, in a smaller bowl simply mix the 2 Tbs. of mustard with the 1Tbs. of Agave Nectar. And your done.  (The ration for the sauce is completely my tastes, you can add or subtract whatever you like.)
I hope you enjoy.  Thanks for droppin' by. 

Wednesday, April 11, 2012

Last Minute Collegiate T-Shirt

Pin It
As I am getting ready to drift off to blissful rest, I am violently shaken, by a completely distraught child.

"Mom tomorrow is wear your favorite college to school day!!!"  "I need some Ute stuff MOM!!!!!" 

All I can say is, "Honey it's 10:45 at night and I am already in bed, sorry."

He came back with, "But Mom, I have this red shirt, can't you do something with it, by the time I have to go to school."

I said, "I'll see, goodnight."
Couldn't sleep all night!!!!  So this is what I did at 4 o'clock this morning.

I think the pictures are self explanatory, but if you need a play by play here it goes:

STEP 1:  In word, print off your college's letter in the size and font you want.  (I actually used photoshop and CollegiateBlackFLF as the font)

STEP 2:  Trace onto freezer paper your design.  Make sure you trace on the paper side not the shiny side.

STEP 3:  With a dry iron (NO steam) set to the highest setting.  Press straight down with the iron.  DO NOT move iron around as if you are ironing.  That could possibly catch the edges of your freezer paper and it will be ruined.

STEP 4:  Once the freezer paper is completely attached, slide either a piece of cardboard or something inside the shirt as a barrier between the front and back of the shirt ( I used a manila folder).  This will help so there is no paint seeping to the other side of the shirt. 

Now you can start using your fabric paint.  There are a variety of paints you can use everything from slick, like I have used here, to glitter and puff.  And you can apply them in whatever method you choose.

Here I squiggled some paint on and dotted it all around my design, making sure I really got the edges.  I then went back and just did squiggle lines.

STEP 5:  Once you have painted your design the way you want it to look...It's time to remove the template.  Hold down the T-shirt as you carefully pull the template off.  Pull up towards you, away from the shirt.  This will help you not get any of the paint that is still wet on the template onto other areas of the shirt as you are removing the template.

STEP 6:  Let the shirt dry for at least 4 hours.  And do not wash for at least 72 hours.  (Because I was in a hurry, I actually used a space heater with a built in fan to dry this shirt quicker).

There you have it!! 

If you have any questions, leave a comment below.  Thanks for droppin' by.

Tuesday, April 10, 2012

Cranberry-Banana-Almond Nut Bread

Pin It
I love to cook!  The only problem is that I am not very good at following directions when it comes to cooking.  I love to experiment and I love to do things a little different.

Today, I tried my hand at Banana Bread making.  I have only made banana bread twice in my whole life.  Not a real fan.  It always comes out too dry.  But my 7-year old son spotted a few very black bananas on the counter and joyfully said, "Let's make banana bread, Mom!!"  

I usually just chuck those into the garbage before anyone notices.

Whenever I have had banana bread I have had to slather it butter to put back some of the moisture lost in the baking.  So, if it were ever to be somewhat good for you I killed it with the ton of butter I "frosted" the slice with.

Well, with all that said, I knew I was going to have to make this loaf a lot differently.  And the first thing I did was use my own home-ground wheat flour.  And of course I had to add my son's secret ingredient, which adds so much moisture that you won't need all that butter.  At least I don't think you will.

Cranberry-Banana-Almond Nut Bread
  • 1/2 C sugar
  • 1/4 C soften butter
  • 2 eggs
  • 2 very ripe bananas
  • 1/2 C sour cream
  • 2 1/4 C 100% whole wheat flour (use hard white if you can, makes bread not as heavy as with red)
  • 1tsp. salt
  • 1/2 tsp. baking soda
  • 1tsp. cinnamon
  • 1/4 C applesauce (my son's secret ingredient, shh don't tell him I told you)
  • 1/2 C chopped almonds
  • 1/2 C cranberries (I use the cran-strawberries from the bulk section from my local grocer.)
  1. Pre-heat oven to 350 degrees.
  2. Cream the butter and sugar until nice and fluffy.
  3. Add eggs one at a time.  Blend them well with the butter sugar mixture.
  4. Mash the bananas then add them by stirring them into the mixture, then do the same with the e sour cream.  Once that is all mixture put in the applesauce (the secret ingredient!!)
  5. In another bowl sift together all the dry ingredients (flour, salt, baking soda and cinnamon). NOTE: I sift to give the wheat flour a little lift.  Remember this is wheat flour so it is a little heavier then the white all-purpose flour.
  6. After you have sifted your flour, add it to the wet mixture.  Kinda stirring/folding it in.  Then add the nuts and cranberries.
  7. Spray a bread pan (I think mine is a 8.5 x 4.5 x 2.5)
  8. Pour your dough in the pan and back for 1 hour or until knife comes out clean.
  9. Let the bread rest in the pan for about 10 minutes and then remove it from pan and cool completely on a cooling rack.
NOTE:  This bread can easily be done with regular white flour.  All the measurements and times stay the same.

If you make this wonderful bread, leave me a comment telling how you liked it.  And if you did it differently....tell me what you did.

Sunday, April 8, 2012

Easy Does It...

Pin It
I have tried to find a blog that, I know that I will post to.  I have a family blog, a health blog, a blog that I gave a name to, but I haven't done anything with.  I have closed a bunch of blogs because the name just was not right....and on and on and on.

Well, here I am starting another one.  I guess trying to mark my place in the blogesphere.

The name:  Lemonade & Porch Swings.

First of all, let me tell you, I am a southern girl.  I grew up in North Carolina, although I was born in the windy city of Chicago, Il.  My memories are there, as well as several members of my family and scores of friends.

Growing up there, I was able to see all of the beautiful homes.  Large yards and porches wrapped all the way around the house, are plentiful.  There is one house I love.  I actually visit it every time I am in town.  It's yellow and white, with a massive wrap around porch and several porch swings and table settings dotting french doors all along the front.  It is a beautiful home.

I have imagined myself sitting there on the front porch with my family and friends on a blistering summer day drinking an iced cold lemonade swing back and forth on a porch swing, laughing, talking, creating memories....just taking it easy.  I imagine a lot of beautiful things I can create, make and admire in that house.

That is what this blog is about.  Nothing serious.  Just enjoying the wonderful things of life: crafts, recipes, quilts. stories, books, etc.

So I hope you learn somethings from L&PS, but more importantly, I hope you can share with us your craft ideas.  I am more than happy to post it here.

Thanks for stoppin' by!!

Monday, August 22, 2011

How to Reupholster a Wingback Chair Part II

Pin It
Look at that chair!!!!


So how did I get there?

Well, it all started when....just kidding. 

You know all those fabric pieces I told you about in Part I and how you should Label them all...well this is where all that advice comes in handy.  We will be working in a reverse order for getting the chair all back together.
  • I ordered 5 1/2 yards of fabric for this chair and used nearly all of it.

  • No pictures, but for the tools needed for the rebuild are:

    • Staple Gun

    • Upholstery staples (I used 5/16" but I would actually use a little longer, may 1/2")~ you can get these at Lowes or Homedepot.

    • Hot Glue Gun

    • Small Hammer

    • Cardboard Strip (2) 1/2" wide and as long as the armrest

    • Hanger Tape

    • Tacks 

    • PATIENCE & TIME (although not as much as the ripped down)
Putting it all back together
Step 1: Use the upholstery you ripped off as your templates and mark up your new fabric.  Instead of writing on it use a piece of paper to transfer your Label info (i.e #2, Back, Top, etc.)  Do not skimp!!!  If the fabric you removed has a little more than you think it should, don't try and negotiate with yourself for using less.  Nope there aren't any pictures of this...it's pretty self explanatory. 
Step 2:  Piping.  This was a little tricky for me since I have NEVER made piping or used it in anything, so I went to the net and this is the coolest biased tape~piping making blog entry I found HERE. I will most likely make biased tape this way FOREVER...it's so cool.  It took me a few times to get it right, but by George, I've think I've got it!!  ***Nope still no pictures*** (there are some on the link that are great).

By the way this same tutorial gives you info on how to make your cushion.
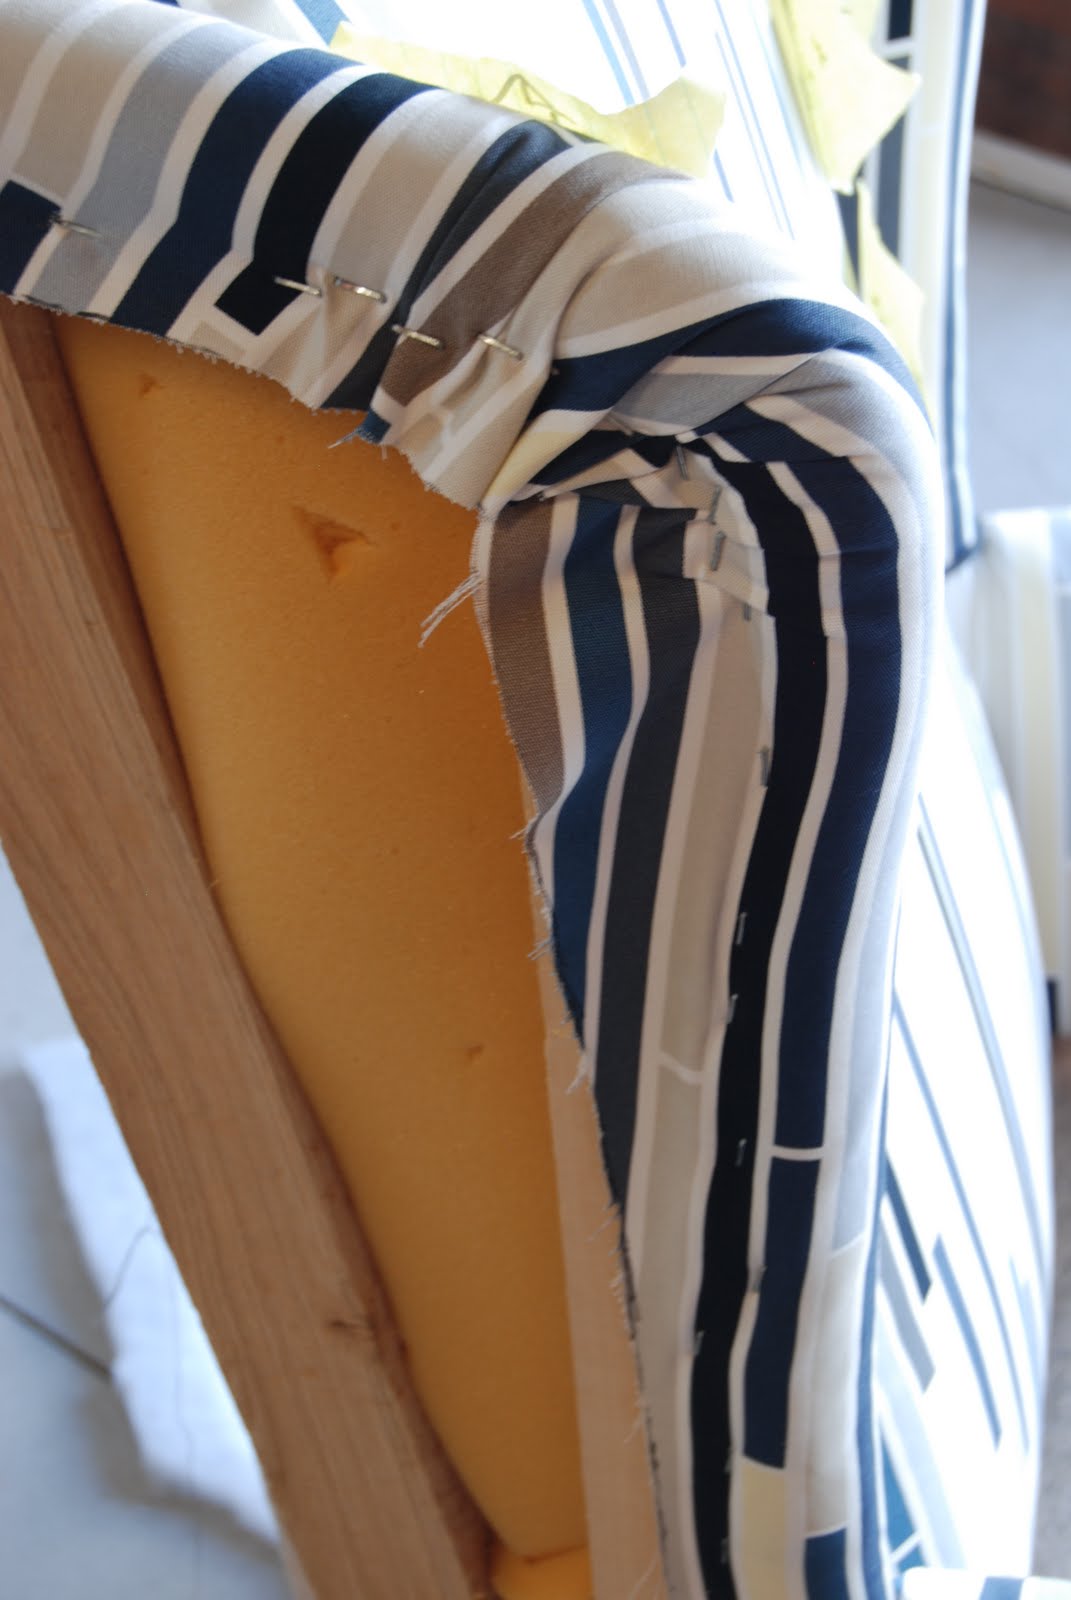
Step 3:  We've come to the chair now!!!  Yea!!  #8 was the "seat" area that I did not remove.  I used a piece of fabric to cover it.  Staple the center bottom first.  It helped me make sure my lines were where I needed them to be. If you are working with fabric that pattern is not a factor, this is a non issue for you.  I then ran a bead of hot glue on the underside of the new fabric and pressed it onto the chair.


<> I don't know what I was thinking when I thought...STRIPES!!!</>
 

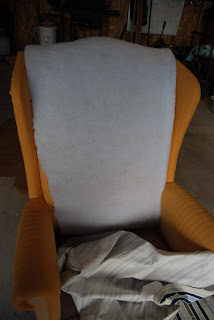
Step 4:  Backrest.  The padding on this was in really great condition.  Thank Goodness!!  But I wanted to have my new fabric against new padding so I added a thin layer of batting.  You can find this at any fabric store, even Walmart. You cut the size you need and just stuff it in on the sides and bottom.  You will then staple the top of the batting down onto the top ridge of the chair.  You will then place your new fabric on the backrest and stuff it also on the sides and bottom until you can gently pull the fabric through to the back.  At top of the backrest there is a little curve in the chair.  You make it easier to follow that curve you will need to cut slits in the edge.  Clip really close being careful not to cut to far into the curve and staple it down on the back on the chair. (It isn't as tricky as it sounds).


Step 5:  Those wings!!  You need to cover them with batting as well and staple.  With this piece, #6, it did require a little sewing.  Each chair is different, some are individual pieces, some are just slipcover like, so I can only tell you about the kind I have...a little of both.  These wings were attached at what I call the "inner elbow."  So I used the old fabric template and made my new fabric mimic the same.  Once I completed the sew project for this I placed it on the chair, making sure the lines were straight up and down and that the "inner elbow" fit perfectly.  IT DID!!!  I was shocked!  Stuff the sides in pulling the extra fabric to the back and bottom and wrap the armrests and staple.


Make sure that when you staple the armrest fabric down that you gently pull it down towards the edge of the wood then staple.  DO NOT staple under the armrest.  It won't look nice and straight when put the bottom half on.  Trust me on this, I did it wrong the first time and had to redo my arms :-(.


Step 6: #5, The outer wing.  More sewing here.  I added the piping to the edge of this piece.  Originally on the chair it just stapled there and for the life of me I just could figure out that out, so I just added the piping to the piece and hot glued the really curvy piece in place and stapled the rest.  SO much easier! As you can see I also added a bit of batting to the outside of the chair as well.


Step 7:  That brings us to piece #4, the sides. Lay your chair on it's side. Holding the cardboard strip to the edge of the fabric place it next to the edge of the armrest fabric (right sides towards each other).  Evenly, push up, making sure all is still aligned...staple all along the cardboard strip.  


I didn't get a picture of this {sorry}, but pull down the fabric and staple it to the bottom of the chair.   Fold the front piece on the front part of the chair, staple.  Tug a little and staple the back piece.  Here you will have the legs to go around, just make it look nice and staple towards the back.
Step 8: Not really sure what to call them other than #3  Those little decor pieces that I had to pop off.  NO PICTURES.  I just covered them with fabric and nailed them back into place (go back to Part I, to see what I'm talking about here...I really don't what to call that piece.)
Step 9:  We're almost done!!!  #2  This was the hardest piece.  Not because it is difficult to put on, but find the materials you need.  I needed a nail strip, but everywhere I went they no longer carried it, so I had to improvise.  But first, I needed to staple the arched cardboard in the middle of the back.  Then I gently stuffed the fabric down and flipped it over. Then I went on to make my own nail strip.  To make it a bit easier than I thought it would be. I used a bit of double sided tape.  Place it on the Hanger Tape (which is in the plumbing section at Lowes) and place the strip on the edge of the fabric (wrong side) and turn toward the chair.  Use your finger to find the hole and tack it.  Once you have all those in gently tug on the bottom and stretch the fabric over the bottom wood piece and staple.  Done.


 Step 10:  Last step (if you want it to be).  Staple the mesh , #1, back to the bottom of your chair.


Step 11:  Now...Do the Hustle!!!!  You are done.

I actually sprayed my chair with a fabric protector at the end.  You don't have to do that, but I recommend it.  Can't be too careful right?


If you missed Part I click the link below:

How to Reupholster a Wingback Chair Part I

If this post has helped you please leave a comment.  I'd really appreciate it.
Related Posts Plugin for WordPress, Blogger...