
Look at that chair!!!!


So how did I get there?
Well, it all started when....just kidding.
You know all those fabric pieces I told you about in Part I and how you should Label them all...well this is where all that advice comes in handy. We will be working in a reverse order for getting the chair all back together.
You know all those fabric pieces I told you about in Part I and how you should Label them all...well this is where all that advice comes in handy. We will be working in a reverse order for getting the chair all back together.
- I ordered 5 1/2 yards of fabric for this chair and used nearly all of it.
- No pictures, but for the tools needed for the rebuild are:
- Staple Gun
- Hot Glue Gun
- Small Hammer
- Cardboard Strip (2) 1/2" wide and as long as the armrest
- Hanger Tape
- Tacks
- PATIENCE & TIME (although not as much as the ripped down)
Putting it all back together
Step 1: Use the upholstery you ripped off as your templates and mark up your new fabric. Instead of writing on it use a piece of paper to transfer your Label info (i.e #2, Back, Top, etc.) Do not skimp!!! If the fabric you removed has a little more than you think it should, don't try and negotiate with yourself for using less. Nope there aren't any pictures of this...it's pretty self explanatory.
Step 2: Piping. This was a little tricky for me since I have NEVER made piping or used it in anything, so I went to the net and this is the coolest biased tape~piping making blog entry I found HERE. I will most likely make biased tape this way FOREVER...it's so cool. It took me a few times to get it right, but by George, I've think I've got it!! ***Nope still no pictures*** (there are some on the link that are great).
By the way this same tutorial gives you info on how to make your cushion.
Step 3: We've come to the chair now!!! Yea!! #8 was the "seat" area that I did not remove. I used a piece of fabric to cover it. Staple the center bottom first. It helped me make sure my lines were where I needed them to be. If you are working with fabric that pattern is not a factor, this is a non issue for you. I then ran a bead of hot glue on the underside of the new fabric and pressed it onto the chair.
<> I don't know what I was thinking when I thought...STRIPES!!!</>
<> I don't know what I was thinking when I thought...STRIPES!!!</>
 |
 |
Step 4: Backrest. The padding on this was in really great condition. Thank Goodness!! But I wanted to have my new fabric against new padding so I added a thin layer of batting. You can find this at any fabric store, even Walmart. You cut the size you need and just stuff it in on the sides and bottom. You will then staple the top of the batting down onto the top ridge of the chair. You will then place your new fabric on the backrest and stuff it also on the sides and bottom until you can gently pull the fabric through to the back. At top of the backrest there is a little curve in the chair. You make it easier to follow that curve you will need to cut slits in the edge. Clip really close being careful not to cut to far into the curve and staple it down on the back on the chair. (It isn't as tricky as it sounds).


Step 5: Those wings!! You need to cover them with batting as well and staple. With this piece, #6, it did require a little sewing. Each chair is different, some are individual pieces, some are just slipcover like, so I can only tell you about the kind I have...a little of both. These wings were attached at what I call the "inner elbow." So I used the old fabric template and made my new fabric mimic the same. Once I completed the sew project for this I placed it on the chair, making sure the lines were straight up and down and that the "inner elbow" fit perfectly. IT DID!!! I was shocked! Stuff the sides in pulling the extra fabric to the back and bottom and wrap the armrests and staple.


 |
| Make sure that when you staple the armrest fabric down that you gently pull it down towards the edge of the wood then staple. DO NOT staple under the armrest. It won't look nice and straight when put the bottom half on. Trust me on this, I did it wrong the first time and had to redo my arms :-(. |
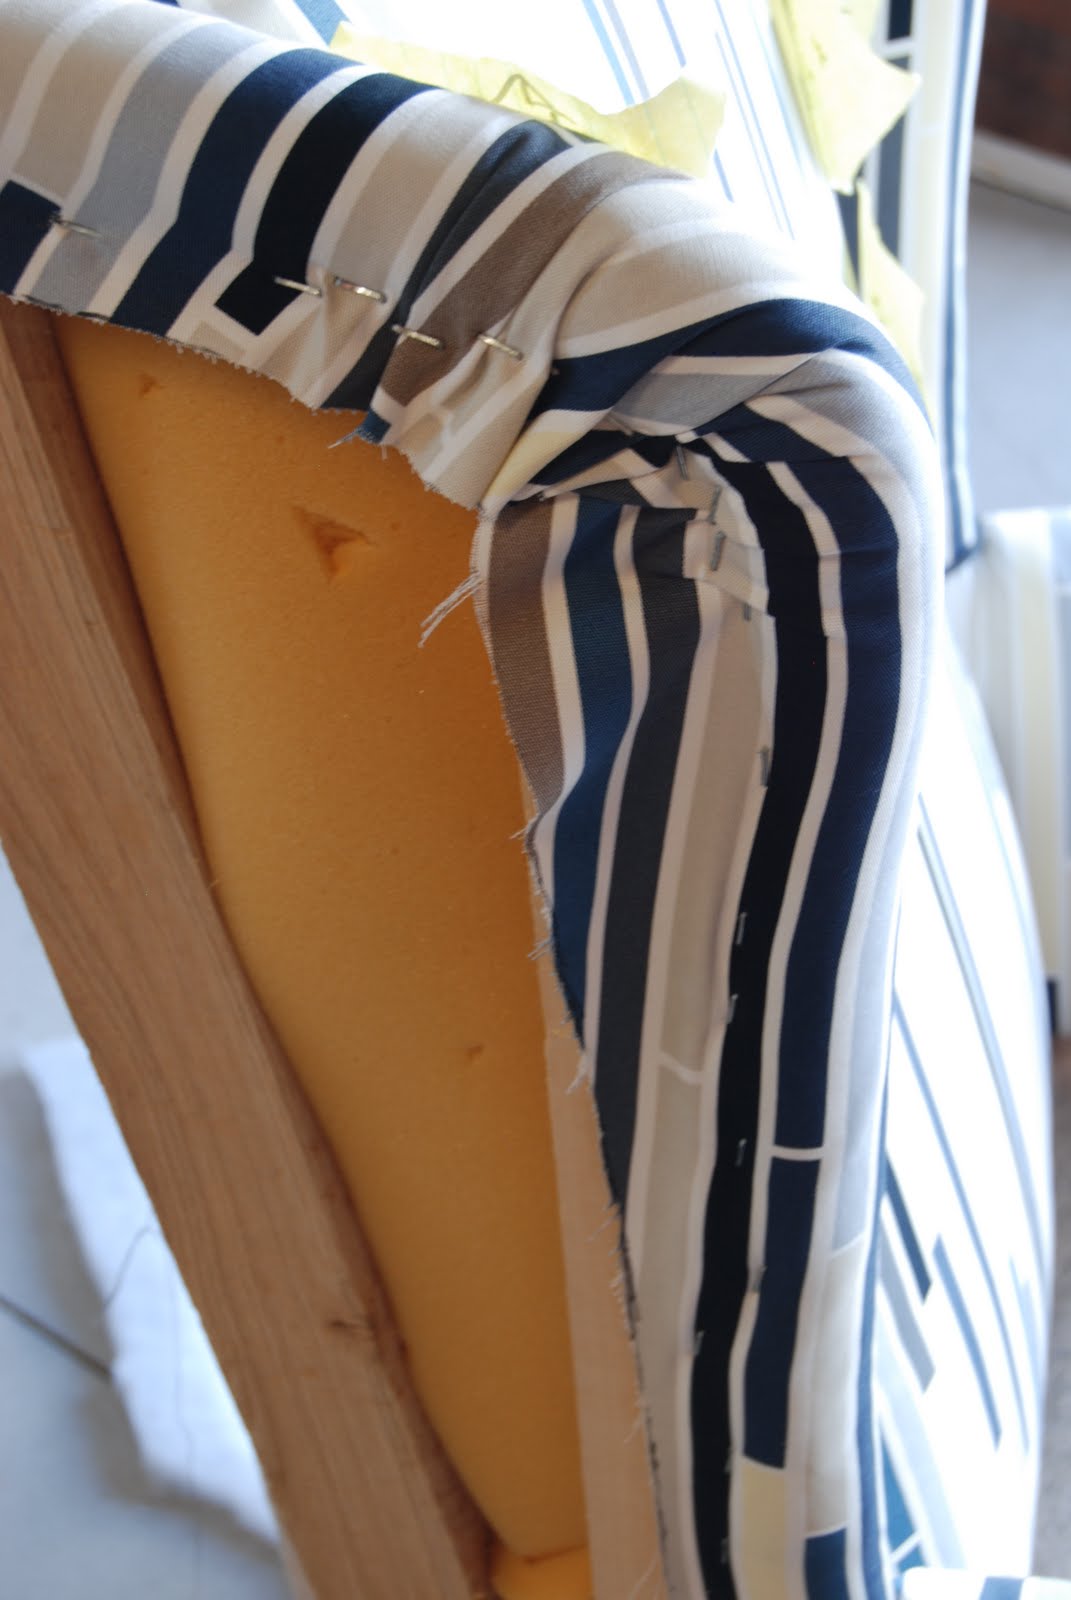

Step 6: #5, The outer wing. More sewing here. I added the piping to the edge of this piece. Originally on the chair it just stapled there and for the life of me I just could figure out that out, so I just added the piping to the piece and hot glued the really curvy piece in place and stapled the rest. SO much easier! As you can see I also added a bit of batting to the outside of the chair as well.


Step 7: That brings us to piece #4, the sides. Lay your chair on it's side. Holding the cardboard strip to the edge of the fabric place it next to the edge of the armrest fabric (right sides towards each other). Evenly, push up, making sure all is still aligned...staple all along the cardboard strip.

I didn't get a picture of this {sorry}, but pull down the fabric and staple it to the bottom of the chair. Fold the front piece on the front part of the chair, staple. Tug a little and staple the back piece. Here you will have the legs to go around, just make it look nice and staple towards the back.
Step 8: Not really sure what to call them other than #3 Those little decor pieces that I had to pop off. NO PICTURES. I just covered them with fabric and nailed them back into place (go back to Part I, to see what I'm talking about here...I really don't what to call that piece.)
Step 9: We're almost done!!! #2 This was the hardest piece. Not because it is difficult to put on, but find the materials you need. I needed a nail strip, but everywhere I went they no longer carried it, so I had to improvise. But first, I needed to staple the arched cardboard in the middle of the back. Then I gently stuffed the fabric down and flipped it over. Then I went on to make my own nail strip. To make it a bit easier than I thought it would be. I used a bit of double sided tape. Place it on the Hanger Tape (which is in the plumbing section at Lowes) and place the strip on the edge of the fabric (wrong side) and turn toward the chair. Use your finger to find the hole and tack it. Once you have all those in gently tug on the bottom and stretch the fabric over the bottom wood piece and staple. Done.


Step 10: Last step (if you want it to be). Staple the mesh , #1, back to the bottom of your chair.

Step 11: Now...Do the Hustle!!!! You are done.
I actually sprayed my chair with a fabric protector at the end. You don't have to do that, but I recommend it. Can't be too careful right?

If you missed Part I click the link below:
How to Reupholster a Wingback Chair Part I
If this post has helped you please leave a comment. I'd really appreciate it.
If this post has helped you please leave a comment. I'd really appreciate it.

Looks beautiful! I'm trying to work up the courage to do two chairs I have sitting in the garage.
ReplyDeleteGreat instructions and tuitorial. this is something I've always wanted to learn to do. Also would like to learn how to paint used furniture. One of these days, I'm going to get brave enough to try it. If I could only work with an expert that will have patience to teach me these things without chastizing me.
ReplyDeleteWow! You did a great job. I want to try this! Thanks!
ReplyDeleteVery pretty you inspired me. Thanks.
ReplyDeletejust what I was looking for. thank you
ReplyDeleteI hope that it helps.
DeleteI have seen so many reupholster tutorials and yours was by far the BEST! Thank you. And your chair looks like it was done by a professional also, beautiful.
ReplyDeleteThank you.
ReplyDeleteThank you for the instructions. I have 2 wingvack chairs I have to redo. This information was very helpful.
ReplyDeleteHow did you do the cushion?
ReplyDeleteThis is how I did the cushion. It was very helpful.
Deletehttp://www.sewmamasew.com/2008/07/summer-sewing-perfectly-portable-cushion/
Your tutorial on reupholstering the wing-back chair is so very good. Between the narration and the pictures you make it look like I can also do it. Thank you!
ReplyDeleteGreat tutorial! One of the best I've seen.
ReplyDeleteBy any chance, do you remember where you bought that fabric? Thank you
ReplyDeleteI believe it was Joann's.
Delete