Showing posts with label Recipes. Show all posts

Friday, February 7, 2014

Paleo Style Chicken Curry & Spinach w/ Paleo inspired Naan Bread

Pin It

Let's just get to it. Curry part of this recipe can feed at least 2-3 people.


Chicken Curry & Spinach w/ Paleo Naan

6 oz. cubed chicken breast
1 Tbsp. Tapioca Flour
1 Tbsp. Curry Powder
1/2 tsp. Turmeric
1/4 tsp. Cumin
Salt to taste
Red Pepper Flakes (optional)
1 1/2 Tbsp. Butter
1 C. Lite Coconut milk
1 C. Water
4-6 C. fresh Spinach
Coconut Oil Spray

For the Naan Bread - I was totally inspired by the recipe I found at My Heart Beets. 

It is fabulous!!!  It only uses three ingredients!!which led me to experiment more with Tapioca Flour, especially using it in this simple and fast curry.

1. Spray med. size pot with Coconut oil. Heat to med. high and cook cubed chicken. About 5 min.

2. While chicken in cooking, put the next 4 ingredients in a small bowl, adding red pepper flakes it you like (the more you add the spicier...I like it hot!!). Mix together well.

3. When chicken in nice and golden remove from pot. Add butter and reducing heat to med. low. When butter has melted dump in the spice mixture, stirring together using a whisk. Add coconut milk and water. Whisk! Whisk! Whisk. (This combines & thickens pretty fast).

4. Add chicken back to the sauce. Allow to simmer on low for 3-5 minutes. Salt to taste.

Sauteed Spinach

1. Spray a skillet with the coconut oil and heat on med high.

2. Add spinach and as it wilts down add just a Tbsp. of water. Stir around making sure all leaves have been cooked down. Salt to taste.

Happy Eating!!

Wednesday, January 29, 2014

Tuna Pattie Salad w/ Spicy Brown Mustard & Honey Dressing

Pin It


Getting creative with this was fun. 

Tuna Patties Salad
*1 can 5oz. tuna in water, drained
*1 lg. egg
*1/4 C. Almond Flour ( if you don't have this, use plain bread crumbs)
*1 tsp. dried dill weed
*1/4 tsp. garlic powder
*1/4 tsp. onion powder
4-5 dashes of Tabasco Chipotle Sauce
*Coconut Spray Oil
*1 lg handful of Spinach greens
*1 Roma Tomato, chopped

Dressing (this is all approx. as I DID NOT measure this...It was just perfect in the end.)
*1 1/2 Tbsp. Spicy Brown Mustard
*1 Tbsp. Honey
*2-3 dashes of Tabasco Chipotle Sauce

1. In a small bowl mix all of the above ingredients together. NO SALT needed.
2. Spray oil in a med size skillet until it is nicely coated. Heat to medium.
3. Using a 1/4 cup scoop mixture into hot skillet and cook 3-4 minutes per side..
4. Remove from skillet when both sides are a nice golden brown. Allow to rest a couple of minutes before putting on top of spinach greens.
5. Assemble leaves, tomatoes and patties on dish and drizzle dressing over top.

This by far is my most favorite lunch thus far.  Tastes soooooo good.

Note: Now, I know I said that this is a recipe for 1, but you will end up with 4 patties....Hey leftovers of this ain't bad in my book.

I hope you enjoyed your visit here! Come on back some time!

Tuesday, January 28, 2014

Lemon-Blueberry Pancakes using Almond Flour

Pin It


For a little while now I have not been eating flour, rice, bread, dairy products, sugar....in short I've been eating more paleo.  I have never felt so good!!! I've always thought that it was gimmicky and never wanted to do anything thing that was trendy or just for the moment. But, I hit a plateau in my weight loss journey and I was frustrated. 

A friend of mine told me she was going to do this paleo diet thing and wanted to know if I wanted to do it too.  I ignored the request, but she kept telling me how it has helped her husband's pain subside and he lost 10lbs. in the first couple of weeks...ALL JUST BY CHANGING HIS DIET to a more wholesome and real food one.

So I decided, quietly to do the same.  I didn't tell anyone, not even my family. I just started cooking differently and making sure the meals provided where less starchy and more veggie wholesome with great proteins.  They have not gripped one bit.  My husband and eldest son, actually gave me a compliment on the changes they can see. I have lost 11lbs. in the last 2 weeks eating this way.

With that said, I realized I will need to start having some bread items, as I LOVE BREAD!!! So, this is my first bread item, that doesn't have your typical flour. It uses Almond Flour.  You can make it yourself, if you have a great blender (raw slivered almonds would be easier than the whole on your blender, just pulse until nice and fine crumbly) or buy it at your local grocer.  We have a WinCo market here and they have almond flour in their bulk section.

Lemon-Blueberry Pancakes w/ Almond Flour
Serving Size:3 pancakes

1/2 med. banana, mashed
1/2 tsp lemon juice
1 lg. egg
1/4 C. Almond Flour
1 tsp. baking powder
1/8 tsp. baking soda
1 Tbsp. Sliced almonds
1/2 C. thawed, frozen blueberry or fresh (next time I think I will only use 1/4 C. It wasn't a problem, just a little heavier than I some would like, but I love blueberries!)
Coconut Oil Spray

1. Mashed the bananas until they are very gooey. Add the lemon juice & egg. Mix together well.
2. Add the flour, baking powder, soda, and almonds. Stir together until nicely combined.
3. Add blueberries. Fold them into the batter, being careful not to crush them.

4. Spray your pan with the Coconut oil. Heat on Med-Low. (this is key!!) Scoop a 1/4 cup of the batter into the pan and using a spatula spread it out a bit. Note: This is not a super runny batter. Cook for 2-3 minutes and then flip and cook for an additional 2 minutes.

5. Serve and top with the remaining half of the banana.  (In my opinion, no need to syrup).

Thanks for stoppin by!! I hope you like.

Thursday, January 23, 2014

Lime Chicken w/ sauteed Spinach Red Peppers and Onion

Pin It


Wednesday, January 22, 2014

No Bake Protein Energy Bites

Pin It

Pretty self explanatory, RIGHT?


Wednesday, October 30, 2013

Salsa Chicken & Spinach Pizza (for one)

Pin It

So why haven't I posted lately?!?!  No real excuse just being lazy and caught up in other "stuff"....You know the "stuff of life".  Anyway, I hired a couple of personal trainers, to help me get this body into shape!!!  With that, they came with a meal plan and workout routine.

The routine is AWESOME!  I have felt so good AFTER the workout is over. They really are getting me into gear for sure.

One of the areas they are also helping me with in nutrition. I have been following a 1500 cal. meal plan and it seems to be working.  They have not told me once, "No, you can't have that, or this." All I have to do is stay in the parameters of the 1500.

So, I have been trying to get creative with that directive and here is one of my many recipes.  I hope you like.  This pizza only comes to 187 calories!!!! I love it

Nakia's Salsa Chicken Spinach Pizza
  • Maya's - Tortillas Whole Wheat 7" Taco Style, 1 tortilla
  • Sabra - Salsa Medium, 2 TBSP
  • Kroger Popeye - Raw Spinach, 1 cup
  • Healthy Ones - Deli Thin-Sliced Rotisserie Style Chicken Breast, 6 slices
  •  Provolone Cheese - Sargento Reduced Fat , 1 slice
Total of: 187 Calories!!!!!...I said that already, right? YUM!!!!

Cook: for 7-8 min. at 425 degrees.


Thursday, July 4, 2013

Linguine w/ Buttered Almonds & Sage & Bacon ( in pictures)

Pin It


YUM-O-LICIOUS!!!!!

Thanks for havin' dinner with me!

NOTE: Cook your pasta according to the directions on the box.  I used a reg. sized box of Whole Wheat Great Value Linguine from Walmart. And it fed my family of 4 with leftovers.

Thursday, June 13, 2013

Simple Blackberry-Raspberry Sorbet

Pin It


Guess what I had for breakfast this morning?!?  Sorbet!!!  It's good for you right?  At least I think  my version is.  Love knowing what is in my food and no preservatives.

Simple is as simple does....or something like that.  This is so easy and I can only think of the myriad of combos I can make with this simple recipe.  I see, Pineapple-Cantaloupe coming soon, after all I have some on my counter and all I have to do is freeze it...YAY bring on summer.

Blackberry-Raspberry Sorbet
  • 1 bag of frozen blackberries
  • 1bag of frozen raspberries
  • 1/2 Cup of blueberry agave nectar (more or less to your taste, so make sure you taste along the way and you can use honey or another flavor or agave)
1.  Allow berries to thaw just a little....like about 10 minutes in a bowl on the counter.
2.  Add berries to the blender a cup at a time. Blend until smooth. (If you have one of those blenders that have the stick stirrer thing, this would be super helpful.)
3.  When berries are all blended add nectar while the blender is on.
4.   Pour into a plastic container, cover and freeze. 4 hours for a nice soft serve or overnight for firmer.  (If you do it overnight allow it to sit out for about 5 minutes before you scoop it up.)

This recipe filled up a quart sized plastic container.

Thanks for comin' over.

Wednesday, June 12, 2013

Browned Butter & Sage Sauce

Pin It


I will from now on through forever make this as one of my signature family dinner eats!!! 

One day last week I got the inch to make homemade pasta and I wanted to have a clear sauce on it instead of the traditional tomato base. Also, the week before I went to the garden shop and bought a lot of herbs.  I have been wanting to do more cooking with FRESH herbs and with some I had never tried before.

Fortunately for me, I had just watched an episode on some channel about brown butter and sage. The lady was in some euphoric state that I had to try this myself.... I GET IT!!! This was so yummy and I will continue to fry sage leaves and have them in my garden if not for any other reason, but this one and that will do for me.

Brown Butter & Sage Sauce
  • 1 stick of salted butter
  • 1 handful of fresh sage (about a cup)

1.  Wash sage to remove any dirt.
2.  Melt butter in pan on High heat. Swirl it around until it is a med brown color. This should happen fairly quick...5 minutes once butter is all melted.
3.  Add Sage leaves and watch them crisp up....30 sec to 1 minute. Remove and drizzle over cooked pasta and toss to coat the noodles. Serve immediately.

Note: Add some chicken or shrimp to this and WOW!!!  What a meal that everyone will love and enjoy.

Bon Appetite!

Thursday, April 25, 2013

Curry Quinoa with Cranberries & such Salad

Pin It
Wow!!  Has it really been over a month!!!  SORRY!!!  Let's just cut to the chase.  My dad died and I had to go back east to handle a lot of things....but I'm back and boy is it hard to get back in the swing of things.

Well, I have a lot of stuff in my head that I need to get out on here and to start a little bit slow, I'm kicking off my return with a recipe.

Curry Quinoa w/ Cranberries & such Salad

  • 1/4 Cup Quinoa
  • 1/2 Cup water
  • 1/2 tsp. curry powder
  1. Bring the water to a boil, add curry powder and quinoa.
  2. Turn heat down to low and allow to simmer for about 10-11 minutes covered.
  • 2 Tbsp. Cranberries (I made the recipe again and used multi colored raisans, tasted wonderful)
  • 1 green onion or scallion
  • 1/2 red bell pepper or shredded carrots (the picture has carrots, but I used red bell peppers when I made it another time and it was great.)
  • a few splashes of Nakano Rice Vinegar Basil and Garlic
  • salt & pepper to taste.
  1. Chop up all the veggies and place in a bowl.
  2. Once the quinoa is done cooking, add it to the veggies and stir.
  3. Add a few splashed of the rice vinegar and salt & pepper to taste.
Sooooooo good and health.  Quinoa is super high in protein. I think this would even be a great salad for my vegan friends.

Yum!!!  Eat up y'all.


P.S.  This is about a 2 serving recipe....Feel free to double or triple.....I did.

Wednesday, March 6, 2013

Roasted Tomato & Egg Salad Sandwich....For One.

Pin It
I have really been focusing on my health and healthy eating lately and with my recent slip on the ice, I haven't been able to do a whole lot of crafting.  With that said, I have been really paying attention to my yummy food intake, especially since I have made a commitment to myself and weightwatchers.

So now you know why you have been seeing so many recipes.  No worries, I will be back in the swing of crafting things in a month or so...hey I might even sneak in a craft or during my "down time."

Anyway, I have a great recipe for a 6 PP egg salad sandwich w/roasted tomatoes and it is SUPER EASY to make.

Roasted Tomato & Egg Salad Sandwich- FOR ONE

Ingredients:
  • 1 hard boiled egg
  • 2 tsp. spicy brown mustard
  • 2 slices roasted tomato (recipe to make your own below)
  • 1 slice of Great Grains Multi-grain bread with flaxseeds.
Instructions:
  1. Chop up the egg and add the mustard; mix well.
  2. Cut 1 slice of bread in half.
  3. Assembly sandwich as seen in the photo.
...now as for the roasted tomatoes

Roasted Tomatoes

Ingredients

Instructions

  • Preheat oven to 500 degrees.
  • Slice tomato into eight slices & put in to a bowl. add the remaining ingredients to the tomatoes.
  • Using your hand mix together, be sure to coat each tomato.
  •  Line a cookie sheet with parchment paper.
  • Place each tomato on the baking sheet. Bake for 20-25 minutes. Allow to cool.
Enjoy!!  Thanks for visiting!!

Friday, February 22, 2013

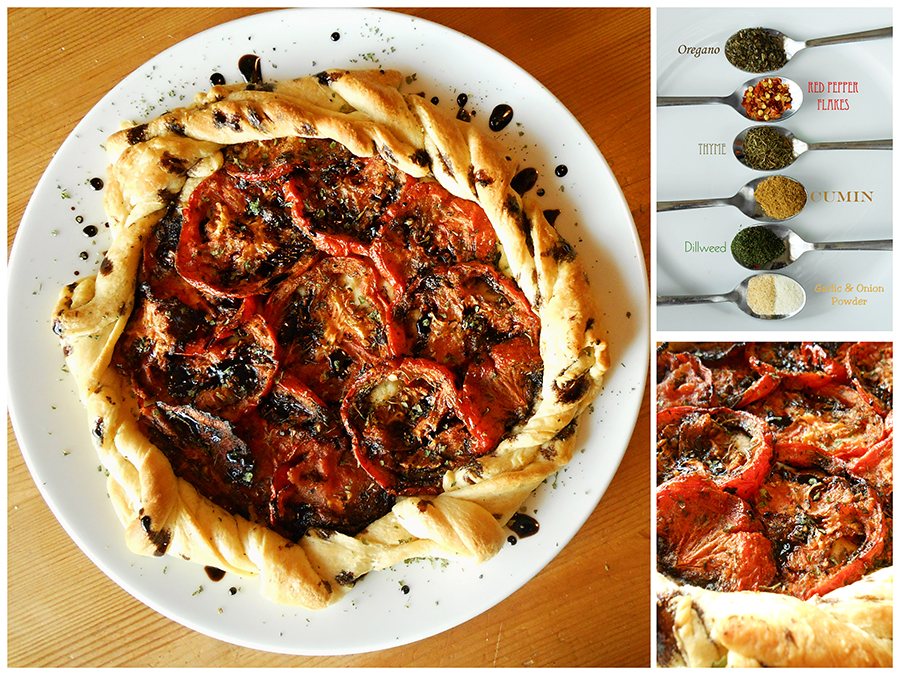
Roasted Tomato Tart w/ Balsamic Glaze

Pin It

Summer can't get here too soon for me.  I have been craving the taste and feel of summer all this winter. 

So today, I needed to have it.  Not even sure what to call this dish, just having Summer Lovin' withdrawal.

This dish is really simple to make, but a little time consuming, but if you do the tomatoes and glaze ahead of time, you can whip it out pretty fast.  It is great as an appetizer or even having a slice for lunch with a nice salad, is sure to please.


Roasted Tomato Tart w/ Balsamic Glaze

Ingredients:
  • 2 vine ripe tomatoes
  • olive oil (just enough to coat the tomatoes)
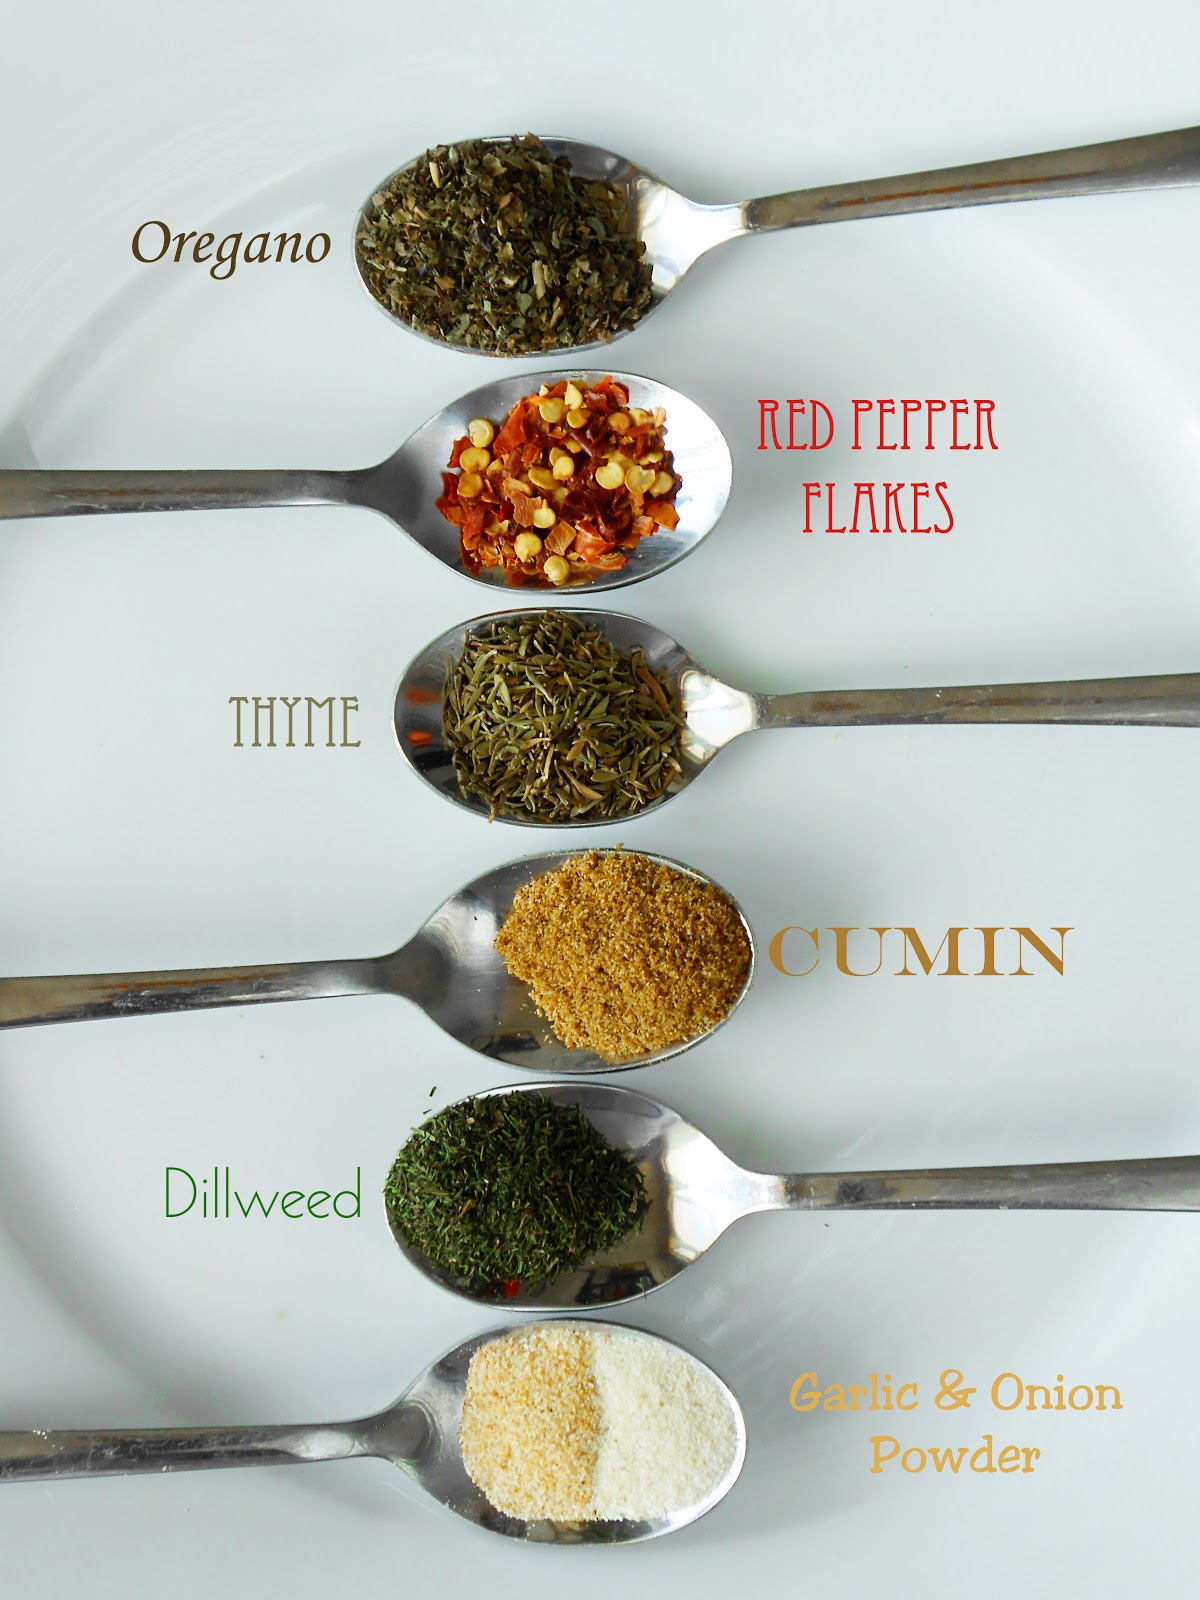
  • dry herbs (Add all that you like, this is a very forgiving dish.  You can add or omit whatever you like.  These are the ones I used for my tart.)
  • Crescent dough
Instructions:
  1. Preheat Oven to 450 degrees.
  2. Slice tomatoes just over a 1/4" thick. Place in large bowl.
  3. Add all of your herbs and oil and toss, using your hands. Be sure to coat the tomatoes well.
  4. Place tomatoes on parchment paper prepared cookie sheet. Single layered (close, but not touching).
  5. Place in hot oven, cooking for about 30-35 minutes until caramelized and looks dry.
  6. Remove from oven and allow to cool.
  7. Reduce heat to 375 degrees.
  8. On a pizza stone or pan, lay crescent triangles in a circle, points out.  Using a rolling pin, flatten the dough, be sure to fill the center.
  9. Place the cooled tomatoes in a spiral pattern on the dough. 
  10. Lift each point and twist and tuck around tomatoes
  11. Return to a oven, cooking for 11-13 minutes.
  12. Allow to cool for a couple of minutes before serving.
Makes about 8 single slice servings.

Sauce:
NOTE:  I make my own.  It's not hard, you just have to watch it and stir occasionally. But I would recommend just heading to the grocery store and getting a bottle (I will make a video, because it's a little hard to explain in words).
  • Drizzle the sauce all over the top of the tart. Sprinkle with a little dry parsley flakes.
Yum!!! 


Thanks for visiting!! 

Wednesday, February 20, 2013

Spicy Buffalo Cauliflower....

Pin It
All of the FLAVOR (not to mention heat), but none of the guilt.


Lately, I have had a pinched for heat.  Maybe it's the need to feel warm from this crazy winter.  But since I have taken on this challenge to weigh less and be smart about my health I have had to think and look at "goodies" a little differently.

I love a good buffalo wing!  But they tend to be oil and not all that great for you.  I wanted some but I needed to find a way to get the flavor without all the bad stuff too.  I went search and found a great site call skinny taste.  LOVE IT!! 

There she has a recipe for buffalo cauliflower.  YUM!!  The only thing is there is still butter in the sauce and I am really trying to limit the oils.  So I came up with this, which uses, whole wheat flour instead of all purpose white flour and spray oil, which is very limited.   My sauce seems to be a bit more spicy, but that's how I like it. :-)


SpicyBuffalo Cauliflower

Ingredients
  • 3 cup(s) uncooked cauliflower
  • 1 cup(s) whole wheat flour
  • 1/2 tsp garlic powder
  • 1/2 tsp onion powder
  • 1 tsp baking powder
  • 2 Tbsp Trader Joe's© Grocery - Parmesan & Romano grated cheese
  • 1/2 tsp table salt
  • 1 cup(s) water
  • 3/4 cup Tapatio Hot Sauce
  • 2 Tbsp Koops Mustard, Deli Spicy Brown
  • 10 second spray Pam Cooking Spray, No-Stick, Butter Flavor
Instructions
Preheat oven to 425 degrees.

1. Wash and break apart cauliflower.

2. In a large mixing bowl add the next 7 ingredients and mix well.

3. Add the cauliflower; stir until well coated.

4. Spray cookie sheet with oil.

5. Using tongs, tongs place coated cauliflower on to cookie sheet, not touching if possible.

6. Bake in oven for 20 minutes.

While cauliflower are cooking...

Sauce:

1. In another mixing bowl or after cleaning the other one out, add the mustard and hot sauce.
2. Mix together well.

Now back to the beginning....

7. Ding!! The 20 minutes are up and now remove the cauliflower from the oven.

8. Scoop into the bowl with the hot sauce mixture:; gently stir to coat cauliflower in the hot sauce.

9. Return cauliflower to the cookie sheet and oven for 5 minutes.

10. Ding!! They are done. Let them cool for a couple of minutes then serve.

You can make a bleu cheese yogurt dressing if you like, but the points here are just for the Buffalo Cauliflower.

4 Points Plus Value
Prep time: 10 min
Cook time: 25 min
Serves: 4 (1 cup servings)

Wednesday, February 13, 2013

When in a pinch....Make Biscuit Pizzas

Pin It
When in a pinch....Make Biscuit Pizzas.

 
With all of our responsibilities, sometimes dinner is late....okay most of time nowadays, dinner is late, but one thing I like to make sure of is that we have "quickies" at the ready.

I keep at least 2 canisters of grands biscuits in my fridge for that very reason.

Here's how we make a quick pizza:

1. Open the can and pull apart the biscuits.
2. On a cookie sheet ( I use a stone ), press down the biscuit, until it is about 6" inches in diameter
3. Top it with a Tablespoon of your favorite spaghetti or pizza sauce and a 1/3 cup of shredded cheese.
4. Now this optional: pepperoni or chopped veggies, mushrooms, jalapenos, etc. etc. Cook at 425 degrees for about 10-12 minutes. :-)

If you really want to get all fancy use pesto as your base, topped with shredded cheese, spinach and grilled chicken. YUM!!!

Monday, January 28, 2013

Shrimp Salad....Hold the mayo please!

Pin It

Most people love shrimp in any form.  I on the other hand can only handle it in certain forms.  Fried (yummy, but so not good for me, Scampi (way to greasy for my taste buds), Grilled (my most favorite with a nice dry rub) and then there are those itsy bitsy shrimp you find in the frozen seafood section you are supposed to use for salads.

Now those I like when I make a dirty shrimp rice, but I have never used them in a salad form.  I read on the back of the package about a shrimp salad you put on a hoagie, but that just seem like a lot of shrimp for me and it has mayo.  I don't really like a lot of mayo on anything, so although I wanted to try the recipe I decided to replace the mayo and the herbs used and come up with this lighter version that is tasty and just plain good.

Instead of a hoagie, I toasted cocktail pumpernickel bread and that add a great crunch.

Shrimp Salad....Hold the Mayo

Ingredients
*1/2 pound(s) frozen salad-size shrimp, thawed and drained
*1/4 cup(s) plain, low fat, Greek yogurt
*1 Tbsp cream cheese, softened
*1/2 tsp dried dill weed
*1/2 Tbsp fresh lemon juice
*1/8 gm garlic powder, pinch
*1/8 gm onion powder, pinch

Instructions
*Thaw shrimp and drain. Place in a medium bowl.

*Mix yogurt, softened cream cheese, dill weed, lemon juice , a pinch of garlic powder and a pinch of onion powder, until well combined. Add yogurt mix to shrimp and chill for 30 minutes before serving.

Friday, January 25, 2013

Mushroom Risotto Balls w/ Spicy Brown Mustard

Pin It
 
I shop at a particular grocery store, all because they have a bulk section that has so many different and what I would consider unusual things and I like to get the new stuff and try it.  My trip for this rice like product was no different. 
 
I first learn about risotto watching Hell's Kitchen.  They seem to always have to make it and it always gets some poor want to be chef in trouble.  So naturally I had to figure out why it was so difficult.  With that in mind I bought a few pounds of the stuff and went to work. 
 
I learned it takes a lot of water or chicken broth (adds flavor without additional salt.)
 
With that experience behind me I think I have finely mastered it....at least to my standards and not Mr. Ramsey's I'm sure.
 
This is a appetizer/recipe that you do ahead and put in the freezer and pull out for that all important dinner party or game night......
 
Mushroom Risotto Balls w/ Spicy Brown Mustard
 
1 3/4 C Arborio Rice
1 can of mushrooms drained
1/4 tsp. garlic powder
1/4 tsp. onion powder
1/2 tsp heaping dill weed
2 Tbsp. salted butter
1 can Chicken Broth
4 oz. cream cheese, softened
6 C Water
2 C Italian Bread Crumbs
4 C Vegetable Oil
 
1.  Chop mushrooms
 
2.  Melt butter in med high heated pan, add rice, garlic powder, onion powder, and dill weed, stir until it is coated in the butter, about 2 minutes.  This is where you start to work hard for this!! With the pan and rice really hot you add 2 ladles of water, stirring constantly.  When it looks like it is drying out completely add another couple of ladles of water. and you do this until the rice is almost done (you are tasting this along the way) add the chicken broth as one of your last liquid ladles.  Cook this down until the rice is soft and you have a creamy like consistency.  Add the cream cheese, stir in well.
 
3. Allow the rice to cool completely.
 
4.  Prepare bowl with bread crumbs.
 
5.  Using a small to medium scoop, for uniformity, scoop out risotto and make a tight ball and roll around in the bread crumbs.  Place balls on a wax paper covered cookie sheet. Place in freezer for 30 minutes.
 
6.  Heat oil on high in a large pot, or if you have a deep dryer that'll work too.
 
7.  Cook balls until they are a nice golden brown about a minute. Drain on paper towel.  Cool completely.
 
8.  Return back to freezer and freeze at least 2 hours and once completely frozen place in a freezer bag.  You are now set to have these available for your next party.
 
TO REHEAT
 
1. Pre-heat oven to 425 degrees.
 
2.  Place balls on cookie sheet and bake for 15-18 minutes.
 
3.  ENJOY!!!
 
 
I love these with a spicy brown mustard, but I think they would also be awesome with a spicy sweet chili sauce.
 
Thanks for stoppin' by.


post signature


Sunday, December 30, 2012

Peanut Butter & Chocolate Chip Pie

Pin It

I love a good pie and I love to experiment.  So this morning I got to do both.  Last night, I bought an Oreo cookie crust.  Surprisingly, I have never tasted one before!  As I thought about what I would make with this, I suddenly had a craving for PEANUT BUTTER!!!

Well, before church, I looked all around and started pulling together the ingredients I thought would make this idea of mine delicious.....and rich.

Peanut Butter & Chocolate Chip Pie
  • 1 Oreo Cookie Crust Pie  or any cookie crust (graham, chocolate, etc)
  • 1 package of cream cheese; softened
  • 1 Cup of smooth peanut butter
  • 1/2 C powdered sugar
  • 1/4 C evaporated milk
  • 1 1/2 C whipped topping (Cool whip)
  • 1/2 C of mini dark chocolate morsels
1.  Soften the cream cheese for about 30-45 seconds in the microwave in a large glass bowl.  After cream cheese has softened add peanut butter. Mix on medium high until cream cheese and peanut butter are well combined.

2.  Add powdered sugar to the cream cheese and peanut butter mixture.  Mix well on medium.  Gradually add milk until smooth.

3.  Fold in whipped topping until well blended. 

4.  Pour into cookie pie crust and smooth out.  Sprinkle with the morsels and freeze for about 1 hour and serve chilled.

This pie is scrumptiously rich and will most definitely satisfy that peanut butter and chocolate craving!!...at least it did for me.

I hope you like the pie.

Wednesday, December 19, 2012

A Pasta Story

Pin It

I love pasta and I have been on this fresh pasta kick for awhile now.  Well, I guess it's been a couple of years ago, my gorgeous hubby bought me a hand crank pasta machine.  I love that thing.  Yes it is work but it is worth it as you slurp up those tasty noodles.

I notice that in making my pasta, I HAD to use semolina flour, which isn't the best in the health department I hear, so I thought I would try just my plain old fresh ground wheat flour.  It was delish!!!  So if your interested here's how I make my....
Homemade 100% Whole Wheat Pasta
  • 3 Cups fresh ground hard white whole wheat flour (you can buy wheat flour at any grocery store, even Wal-mart carries it.
  • 6 eggs
  1. Put the flour in a deep bowl & make a well; crack the eggs into the well & scramble them all the while you are gradually picking up flour.  You will get a workout that is for sure at this stage.
  2. Once a soft ball of dough forms pour it out onto a floured countertop or table.  Knead the dough for about 5 minutes. Dough shouldn't be stick , but have a little give when you poke it.
  3. Now because I live in a dry state, I wrap my dough in plastic wrap and let it sit for about 20 minutes. (If you are blessed with more moisture you can just cover the dough with a bowl for the same amount of time.)
  4. After you get some your energy back (20 min. later) Cut the dough into thirds.
I forgot to say this early...I have a hand crank pasta maker my husband bought me a couple of Christmases ago.  During that 20 minute rest you'll want to get it ready.  If you have an electric one by all means use it.

I'm all about less work, but I figure if they see how hard I am working , they'll enjoy it more......

1. Anyway...Always start on the lowest setting with your flat roller and gradually move up.  I typically do a pass through with the dough on 0, fold it and pass it through again.  Then I move on to 1, 2, 3, 4, 5 and 6.  6 being the thinnest I go, but you can go as thin as you like.
    2.  Once you have a long strip, lay flat and cut in to  10-12" sections. 
3.  Switch your attachment to the fettuccine attachment and send your sections through.

To keep the noodles from sticking together, toss them in some of your flour.
When cooking your noodles, bring a large pot of salted water to a boil and drop your noodles in.  It should only take about 3-5 minutes TOPS! to get you to "al dente". 

Add your favorite sauce and bon appetite!!


    With some of the extra dough I was able to get some Spinach and Cheese Ravioli!!!!  It was YUMMA-LIOUS too!!!
Related Posts Plugin for WordPress, Blogger...