Showing posts with label DIY. Show all posts

Tuesday, August 28, 2018

Another Dang Year Went....Just Like That!!!!

Pin It


How in the heck did all this time get by me!?!?! Anyway, LOTS have happened between now and then. Here's the rundown in no particular order:


Music tree for a Christmas Tree in 2017
I had the grand idea over this summer to build an outdoor patio/theater.
My minions at work!! BWAHAHA!! 

I wanted to have planters on the patio so I made them with some of the pallet wood.
Turned out pretty good.
 
And VIOLA!! Here is the finished pallet patio/theater.

I am excited to see what fun we will have here. I still have to get the lights up, but I love it!! We plan to use it also as a stage for out son to have mini concerts. 

This was my post on FB:

I did it!! I have even shocked myself with this one. I built an outdoor ðŸŽ¥ patio near completely out of pallets!! I even included a bar at the last minute because I had some extra supplies.

What have I learned?

1. God gives us all talents and skills. We need to just get out of the way and allow them to be expressed.

2. Pain can be overcome by set goals and desire.

3. One man's trash can be another man's treasure. Thanks for all the pallets.

4. There is absolute beauty all around.

5. Great fence neighbors are GREAT fence neighbors. Thank you Toby for coming to the fence near everyday to give me some girl power encouragement.

6. Frustration is an awesome motivator. I couldn't find anyone to help me till up the piece of land that I was using to build the patio. So instead of being frustrated and angry about that, I got my gold claw and I hand tilled it up myself. Again, my great fence neighbor, Toby, peeked over the fence and encouraged me to keep it going even though I was in a great deal of pain.

7. I have an amazing husband that stands back and allows me to have these crazy ideas and supports me into making them reality...even when he does not understand why I have the desire to do them.

Now, need to buy a projector and some speakers. Already have the lights, just need to put them up. Gotta have a movie night this fall!!

Friday, July 7, 2017

Dresser Rebirth

Pin It

It seems that we have been remodeling FOREVER and still more to do!!! Well, my baby boy is growing up and we have been remodeling his room. I will show y'all that when it complete...just a few other things we got to do.

Anyway, like I was saying, my baby is growing up. As we have embarked on changing things up he told us that he wanted a more grown up look in his room. So, on July 4th we just so happen to look online and saw that a family was moving to LA and did not have the space to take this beauty with them. They sold it to us for only $15!!!! It is a solid piece!!! No MDF on this baby!!!

We knew one thing for sure....the color had to go as well as those dated handles. After 2 days of sanding, whitewashing, painting and some new hardware, a new dresser was born.

Looks pretty good in his "new" room.
(Valspar Black Spray Paint Flat, Custom Gray painted- thinned with water to white wash, Minwax Espresso Stain + Polyurethane, Hardwar from Lowes)


Saturday, March 4, 2017

Be Our Guest...

Pin It


Two years ago we had some guests from Sweden that needed a place to stay while they were visiting. It was a short notice kind of thing and all we had to offer to them was a blow up mattress!! Horrible I know. Anyway, that visit has bothered me and my husband so much that we devised a plan to remodel, in hopes, that if they should ever come to visit us again, we can redeem ourselves.

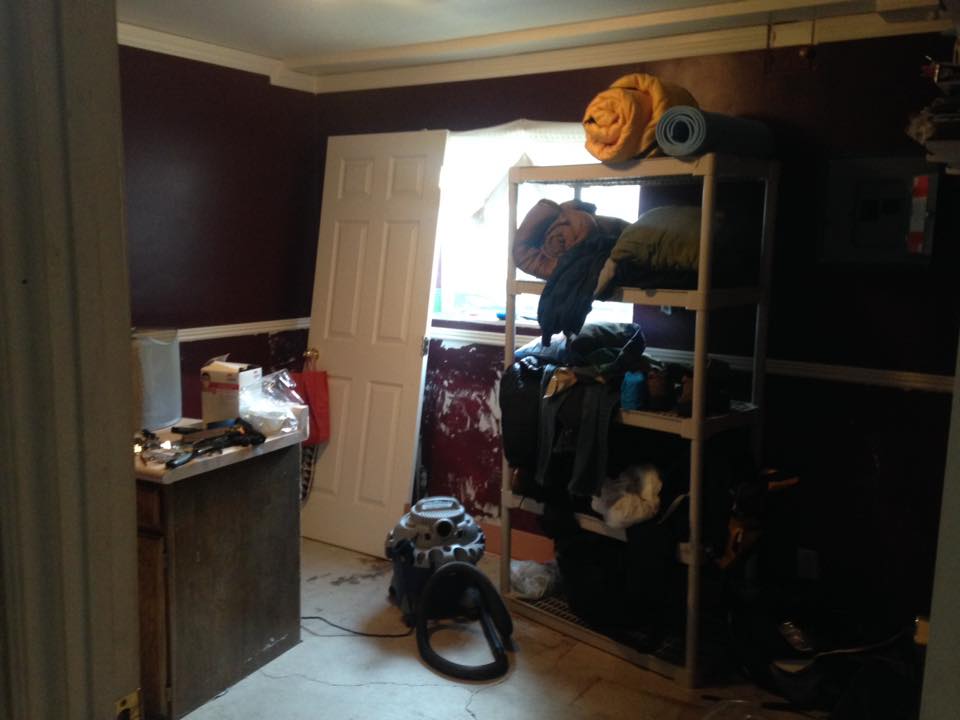
So in the last two years this is what we started with to what we have now.

This was the office. I have no idea why I painted this room so dark. And just be glad you can't see the wallpaper I had up. Horrific!!


My helper was so ready for the change. 


Dont'cha just love paint.
The most expensive thing in the room cost....wait for it....$38!!! I either made my furniture pieces or got them at a ridiculous discount. Some items were given, but most were made. I am pretty happy about that. 

This wall is my pride and joy. I made everything on it accept for the mirrors.


Most  important message there is....
Now our guests have a decent place to lay their heads and keep their things. It has been a labor of love. Can hardly wait to share with you the transformation of the room our guests slept in. It is completely unrecognizable.

Thank you D & D for coming and opening our eyes to being better hosts.


Sunday, December 11, 2016

Changes

Pin It
So my son has been on a mission for our church for the last 15 months and we have been out of sorts with all kinds of feelings and things. But the most recently, we have decided to make some changes for our home from the bottom up.

We started with our missionary son's room and have moved to other rooms our basement. Right now I go the bug in my head that I wanted a pallet wood wall. Lucky me I have a supportive husband who just stands to the side and watch me work. Here is how this journey began and where I am so far. Much is still left to do to get this room completed but it is on it's way.

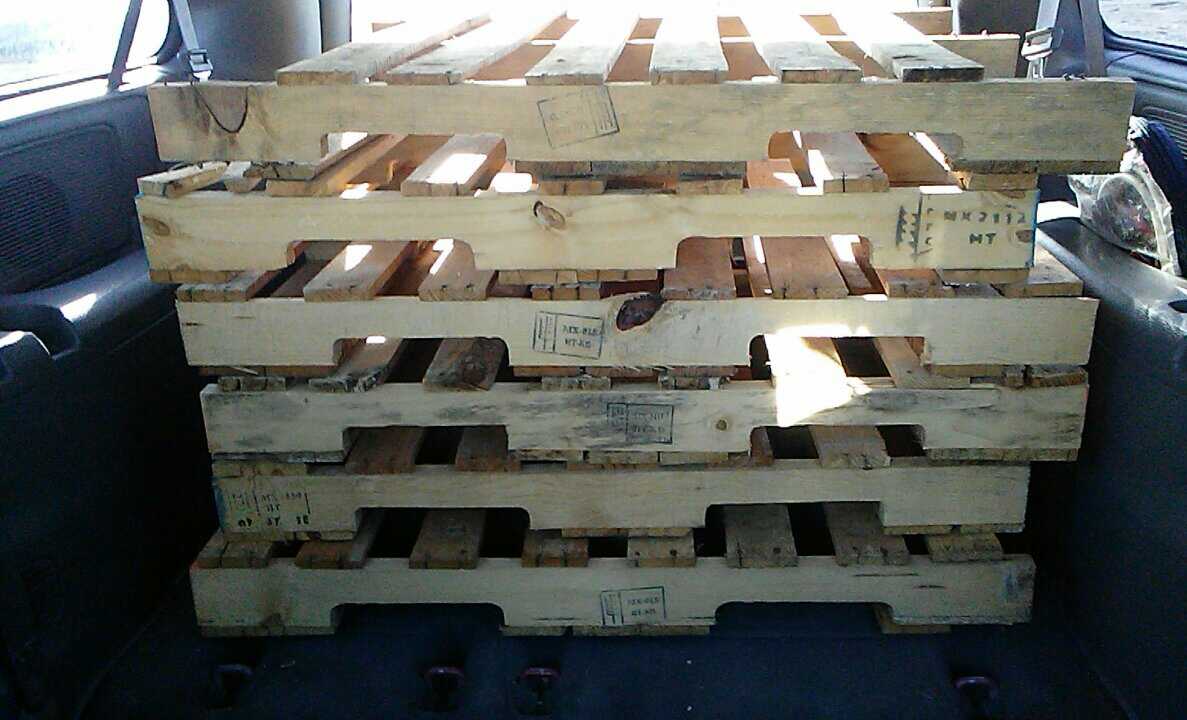
After helping a neighbor lay sod they had several pallets left over. I saw that the pallets were not chemically treated and immediately asked them if I could have them. They gave me six. I thought I would need more, but I made what I had work!! (So when you look for pallets, be sure to find/use ones labled "HT" = heat treated or "KD" = kiln dried. You don't want any yucky chemicals floating around your family.)
Once home and with the help of a neighbor, we got the pallets all broken down. I removed the nails and hosed each board down and set them out to dry. I let them dry for about a week in the garage, then brought them inside to get ready for the wall.


The process begins. I looked at various pinterest ideas on how to get started and I really liked one using strips of 1x3. I began putting up the boards but noticed that I could see the wall behind. So I painted the strips black and wall between each row. 
Wall is complete!!! I loved the process. 


Now am at the point of working on the bench. It is looking good.
 I will post update in the next week of where I am on this project. I hope you all like this and send me messages to keep me motivated to keep sharing with all y'all.

Friday, May 20, 2016

Side Table DIY

Pin It
DIY Side Tables


With our son serving a mission for our church, we decided to remodel his room. I have DIY most everything so far. Once it is complete I will share the complete room, but at the moment one of the items I am super proud of are these side tables.

Our son's room is not very big so a standard nightstand was out of the question. I knew I needed something that was not going to take up much floor space, but it had to be more grown up and not too "girlie". So with that the hunt was on. I could not find anything I liked or was affordable.

One day after work I wondered into a local store, Super Low. They typically have odd and ends kinds of things from high end stores, like Pottery Barn and West Elm. That particular day they had Whitney Hutch pieces that sell on Pottery Barn's website for $250, Super Low had them for $20 each!!!!! I did a little bit of negotiating with them to let me have them for that ridiculously low price and it worked!!

I was so happy to have them, but they had NO LEGS!! I had, at first, thought I would just attach them to the wall, but hubby shut that idea down right away. No unnecessary holes were going in the newly painted walls. So legs were all I was looking for. Lucky for me, I had already had hairpin legs on my radar.

The best place I found the legs was Modern Urban Metals. It is an Etsy shop. They were affordable and just what I needed.

I am having fun with everything that is happening in that room. Can hardly wait for it to be complete so I can show you all.

Thursday, March 31, 2016

How to Remove a Baked on Label

Pin It

Hey everybody!! Life has been too crazy to get into details, but a few things have happened since the last time I posted.

My eldest son graduated high school and now is serving a full time mission for our church in Texas. I began a semester in the University of Utah to study mediation and had it cut short. So that's on hold. I had to have shoulder surgery, which put a hitch in my giddy up. I am slowly mending and with that I am starting to do some crafts.

To start, once our son left we had decided that remodel his room. For starters we needed to add a closet. I am going with more of a farmhouse style. I made a headboard (which looks amazing, and I will post that soon). But something a little smaller to add a little touch of sweetness I wanted a ceramic old fashioned milk bottle. I knew something new would be expensive so off to the thrift store I went.

I found this lovely little thing.


The only problem was that it had a printed label on it that seemed to be baked in. But I loved it. So I had to figure out how to get that off. Below is a video of how I was able to remove it.

Beautiful Lovely vase now.

Sunday, April 19, 2015

Where in the world have I been!!!

Pin It

Wow!!! What is the world!!!! I have been missing in action for a long time. Do so much and little time to do much else. I have been cooking, cleaning, building, planning, mom-ing, wife-ing, etc., etc., But I am now back.

For just getting back in the "swing" of things I am going to ease my way back into things. I will just be posting pics of stuff I have been up to and if you want to know more about it, post a comment. That will tell me if I need to post more detail about that "thing"... So first, here is my latest project.


I don't know if you remember, but I build a pallet wood TV enclosure a while back, well, I got a little tired of it and all the cords so I decided that this is my new solution.

What do y'all think?

Tuesday, August 20, 2013

Printable Lunch Menu Planners

Pin It
So trying to be better this year with the lunches for my boys and I think this will help. I designed these planners so that I could see it and shop better and not be running around the kitchen like a mad woman just before they are to leave.


My one suggestion is that you laminate these after you print them.  This will obviously allow you to reuse them each and every month. I am going to make a frame and show you that later on. But if you just want to print you one of these, leave me a comment and I will be happy to email you the PDF.
Happy New School Year!!!

Friday, July 26, 2013

Outdoor Livingroom Set

Pin It


This seems like it was long time coming, but honestly, it went by pretty fast.  I made these based off of the chairs from the book 2x4 outdoor living. The same book I used to make our porch swing that you can see here. I like the swing so much that I just basically did the same design as the swing but added legs and the bench/coffee table was just what I had in my head....so simple.

If you want the measurements of the the bench/coffee table leave me a message and I will get that to you.

This was so fun and well worth the time and effort....the wood was FREE!!  Gotta love neighbors!

UPDATE: Just moved the furniture into position and built a firepit for them.  So excited for the fall s'mores parties!!


Thursday, July 4, 2013

Finally!!! A Porch Swing

Pin It

Ironically, Lemonade and Porch Swings, has neither a porch or a swing!!!  Up until NOW!!!!!
Funny as that sounds it is true.  I have what some call a "stoop." At least that is what I call the little landing in front of my front door.  I wish I had a wrap-around  porch, but I have am making due with the blessing I have.
Now with all that being said, I do have an arbor my gorgeous husband built for me.....about 10 years ago.  Under it sit an over sized picnic table, we inherited from an neighbor before they moved that needed some TLC and we have enjoyed it ever since.  But the space has needed something else and finally this is what we've decided on.
Most recently, I had the blessed opportunity to walk into my neighbors Eden.  It was the most wonderful, peaceful place I had been in a long time....and it was next door!!! I wanted it and I wanted it bad, but I knew I would not be able to go out and buy all or any of what he has.  Prayer came into play and wouldn't you know it....another neighbor was getting rid of about 30  8-foot pieces of lumber he had left over from a project he used them for.  He offered them for anyone to take... and immediately took Handsome (that's what I call the hubby) over and we took all he had.
Later I learned about this book call 2x4 Projects for Outdoor Living. I picked it up from my local library. It has great ideas and the one I settled on was the swing.  Handsome didn't think I could do it, but when he woke up this morning, well, he was pleasantly surprised and I was proud.
Now I am going to venture into  making an entire sitting set, with two chairs, and a loveseat.  

I think I am going to paint it all red!!

So what do you think?


Related Posts Plugin for WordPress, Blogger...